7 Fast Steps for Water Damage Restoration in Spring City
Water in places where there should not be any is crucial. The presence of water on the floor, behind the wall, or in the basement poses a great risk of causing major damage very quickly.
This guide explains seven practical steps to follow after water damage in Spring City. It covers what you can do safely, what to document, and when to call professionals for Water Damage Restoration, Leak Detection, and Structural Drying.
Step 1: Make sure the area is safe
It is important to identify any hazards before beginning either process. Water can be hazardous, especially when used near electricity. There could be other elements in the floodwaters that could be detrimental to your health.
- Turn off the electricity to the affected area if you can do it safely. This is especially important when water is near outlets, appliances, or the electrical panel.
- If a broken pipe, toilet, or sink caused the problem, shut off the water supply. You may need to close the main water valve.
- Stay away from rooms with sagging ceilings, cracked walls, or other signs of structural damage. Storm Damage Restoration, Remediation & Repairs may be needed when water enters through a damaged roof or exterior wall.
- Look for smoke or soot if the water damage happened during a fire. Fire & Smoke Damage Restoration requires a different cleanup process.
- Do not enter water that may contain sewage, chemicals, or hazardous materials. Contact a professional Biohazard Cleanup team instead.
Step 2: Stop the water and find the source
Drying the area will not solve the problem if water is still entering the building. You need to stop the water and confirm where it is coming from.
- Clean water from a supply line or overflowing sink is usually clear and has little or no odor.
- Stormwater often enters near windows, rooflines, crawl spaces, doors, or basements after heavy rain.
- A hidden plumbing leak may cause a damp area with no clear source. Water can collect behind cabinets, under concrete, or inside walls.
Professional Leak Detection can locate hidden problems without opening large sections of the wall or floor. Finding the source early may prevent more damage and reduce repair costs.
Step 3: Document the damage for insurance
Before throwing anything away, take photos and videos of the affected area. Good records may make the insurance claim process easier.
- Take wide photos of every damaged room. Then take close photos of wet flooring, walls, furniture, and personal belongings.
- Record a short video as you walk through the property. Explain where the water came from and which areas were affected.
- Write down when you first noticed the water. Include the steps you took, such as turning off the water, using towels, or removing water with a vacuum.
- Save receipts for emergency supplies, repairs, hotel stays, and other related costs.
You can move belongings to prevent more damage, but document them first. Content Cleaning & Packout services can remove, clean, store, and return items during the restoration process.
Step 4: Remove standing water quickly
Standing water can soak into flooring, drywall, baseboards, and furniture. The longer it remains, the farther it can spread.
- For a small amount of clean water, you may be able to use towels or a wet-and-dry vacuum.
- Remove rugs and place them in a safe area to dry. Move furniture away from wet flooring. You can place foil or blocks under furniture legs to reduce staining and moisture damage.
- Large amounts of water require professional extraction equipment. Water Damage Restoration technicians use powerful machines to quickly remove water. Faster water removal may shorten the drying process and reduce further damage.
Do not use household equipment when the water may contain sewage or harmful contaminants.
Step 5: Begin structural drying
The room might appear dry despite moisture hidden beneath the floorboards, within the walls, and in the woodwork. Moisture may cause swelling, warping, unpleasant smells, and mold formation.
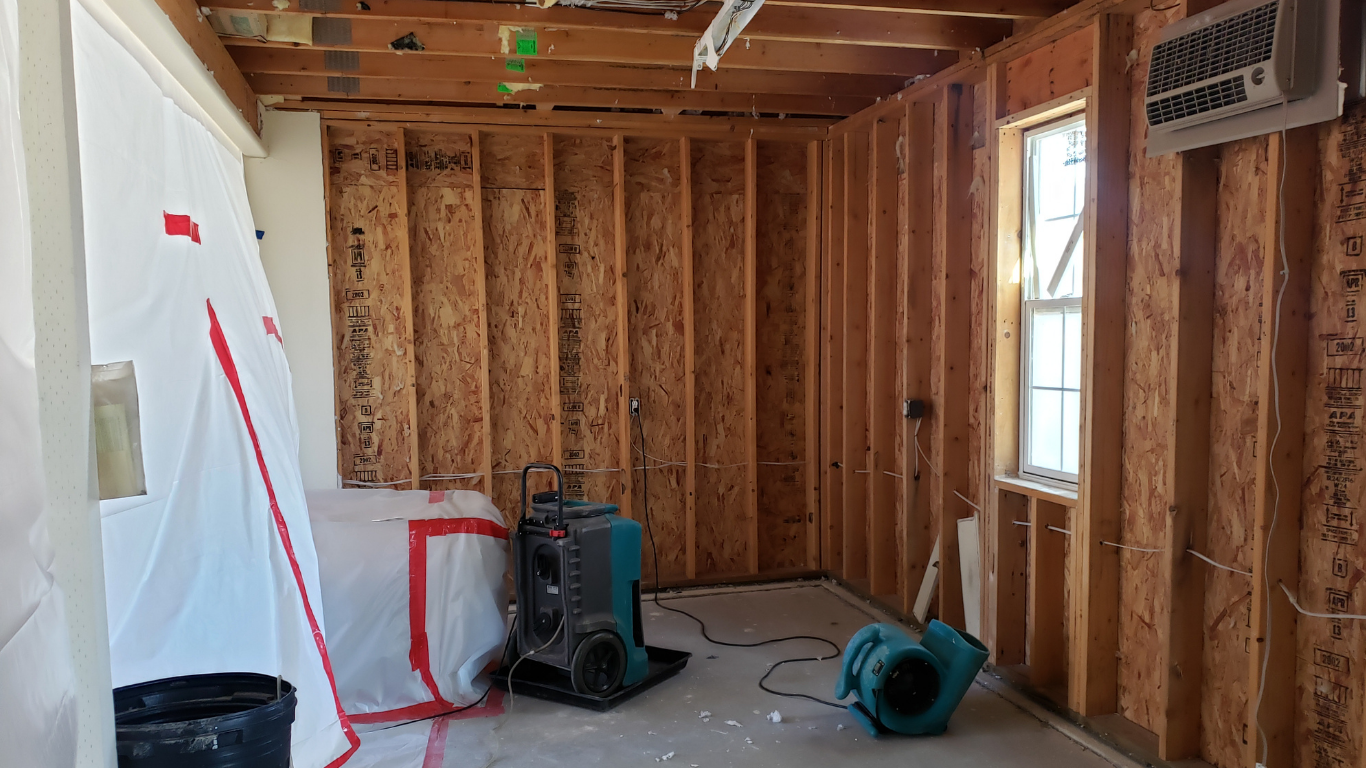
- Professional Structural Drying often uses air movers to push moisture out of wet materials. Dehumidifiers remove moisture from the air and help materials continue drying.
- Technicians also use moisture meters to check walls, floors, and other surfaces. This confirms whether the area is truly dry.
- Basement Drying may require extra attention because concrete, stored belongings, and enclosed spaces can hold moisture for a long time.
- Wet crawl spaces may also need more than a few fans. Crawl Space Encapsulation may help control moisture and reduce future water problems.
Step 6: Prevent mold and remove odors
Humidity in Tennessee can make mold an issue after water damage. Mold will start growing once the wet materials become moist.
- Musty smells, discoloration, stains, and changes in indoor air quality could signal mold. Some individuals could experience coughing, sneezing, or allergy symptoms.
- A Mold Inspection may be needed when water remained in the building for a long time or reached drywall, carpet, insulation, or other absorbent materials.
- Do not paint over stains or try to cover musty odors. The smell will often return if the moisture problem is not fixed.
- Professional Mold Removal may be necessary when mold is visible or suspected inside walls, under flooring, or near heating and cooling equipment.
- Odor Removal can also help after flooding or long periods of dampness. However, odor treatment should always be combined with proper drying and cleaning.
Step 7: Repair the damage and prevent future problems
Once the property is completely dry, repairs can begin.
- Remediation & Repairs may include replacing drywall, flooring, insulation, trim, or damaged structural materials.
- Storm Damage Restoration may be required when wind, rain, fallen branches, or roof damage allowed water to enter.
- Businesses may need Commercial Restoration services to reduce downtime, protect equipment, and handle damaged inventory.
- Older buildings may contain materials that require special care. Asbestos or Silica Dust Remediation may be needed to keep the repair process safe and comply with local rules.
- Water can also damage vehicles. Automotive Flood & Mold Remediation can treat wet carpet, padding, seats, and ventilation systems that are difficult to dry.
After repairs are complete, inspect the roof, gutters, plumbing, foundation, and drainage system. Fixing weak areas may help prevent another water emergency.
What to do during the first hour
- Turn off the electricity if it is safe to do so.
- Stop the water at its source.
- Take photos and videos of the damage.
- Remove standing water when the water is clean and the area is safe.
- Move furniture and valuable belongings away from wet surfaces.
- Increase airflow and lower indoor humidity.
- Call a professional Water Damage Restoration company when the affected area is large, the water may be contaminated, or moisture has entered walls and floors.
Water damage can feel overwhelming, but a clear plan makes the situation easier to manage. Fast action can limit damage and help protect your property.
iRestore provides professional Water Damage Restoration, Leak Detection, Structural Drying, Mold Inspection, Mold Removal, Content Cleaning & Packout, and Remediation & Repairs. Our team can help restore your home or business safely and reduce the risk of future problems.
Contact iRestore today for professional water damage restoration services in Spring City.
To stay updated with us, please follow our Facebook page.